Actions menu
You must have Validation Work Queue Admin permissions to perform all available actions. Some of the actions accessible in the Actions menu (![]() ) in the page header are grayed out and disabled for users with only Validation Queue permissions.
) in the page header are grayed out and disabled for users with only Validation Queue permissions.
When you select one or more items in the table and then select Actions menu (![]() ) in the page header on the Validation queue page, the menu provides the following options:
) in the page header on the Validation queue page, the menu provides the following options:
-
Add note. Allows you to add a note to one or more selected items in the table by selecting Add note. In the Add note dialog that appears, complete the Enter your note here section, and then select OK to save and close the dialog. By default, this option is disabled. To enable, selected an item in the queue.
-
Change queue owner. Allows you to change the owner for the selected items in the table. In the Change queue owner dialog that appears, select a new queue owner from the Queue owner dialog, and then select OK. By default, this option is disabled. To enable this option, select one or more items in the queue.
-
Change queue state. Allows you to change the state for the selected items in the table. In the Change queue state dialog that appears, select a new queue state using the Queue state dropdown menu, select the reason for the change from the Reason dropdown menu, (optional) use the Enter you note here box to enter notes about the change, and then select OK. By default, this option is disabled. To enable this option, select one or more items in the queue.
-
Download. Creates a file containing all validation queue items. The download file renders with all current filter, sorting, column order, and column visibility options applied. In the Download dialog that appears, select Spreadsheet for an
.xlsxfile or Comma separated values for a .csv file. The file saves to your browser's configured download folder.Important! The download file contains all items returned by the applied filters, regardless of the number of rows shown on the screen. For example, if the Items per page value (beneath the table) is 10 but 12,000 items are in the filtered queue, then 12,000 rows appear in the download file.
-
Estimate. Allows you to initiate estimation for the selected items in the table. In the Confirm estimation dialog that appears, if you want the save the reads if validation fails, toggle on Saved reads if estimation fails to enable. To confirm estimation, select YES. By default, this option is disabled. To enable this option, select one or more items in the queue. If you want to stop saving reads when validations fail, toggle off Saved reads if estimation fails to disable it.
-
Manually accept. Allows you to manually accept items for the selected items in the table. In the Manually accept dialog that appears, select a reason queue state using the Queue state dropdown menu, select the reason for the change from the Reason dropdown menu, (optional) use the Enter you note here box to enter notes about the change, and then select OK. By default, this option is disabled. To enable this option, select one or more items in the queue.
-
View queue statistics. Allows you to graph the data in the queue table by owner and status. By default, the date range is set to the last 24 hours, and the statistics for the last 24 hours are displayed on the Statistics panel. In the Validation queue statistics dialog that appears, select the date range, and then click Apply.
-
The graphed data for the given date range will appear in the Statistics panel. The category for each tab on the Statistics panel are Open, Closed, and Total. The data for each category can be viewed in the table next to the graph.
-
To download the queue statistics file, click Download (
 ). The file saves to your browser's configured download folder. This option is disabled when there is no data to download.
-
-
Configure refresh. Allows you to configure how often the items in the queue are refreshed. In the Configure refresh dialog that appears, if you want the specific refresh rate to automatically refresh in the queue, toggle on Auto refresh to enable. Enter the auto refresh rate (in seconds) between 60 and 3600, and then select OK. By default, the Auto refresh is disabled. If you do not want the specified refresh rate to automatically refresh, toggle off Auto refresh to disable it.
-
Save view. Allows you to save the column views and the current filter values for later use. In the Save view dialog that appears, assign a Name to the view, and then designate it as a Project view (available to you and other users) or Personal view (available only to you).
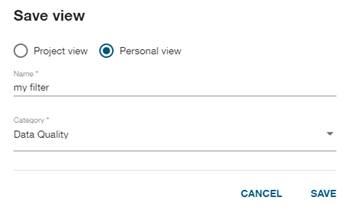
From the Category dropdown menu, you can select a category for the saved view (for example, Data Quality). For more information, see View menu and Filters.
Related topics: