Setting up Itron Platform
Important! The steps in the Securing database connections with TLS procedure must be completed before performing the steps in this procedure.
Use the following procedure to set up Itron Platform:
-
Locate the IEE Install Suite (IEEInstallSuite.exe) and place it on the server where you will install the Itron Platform component.
-
Run the installer.
Important! Be sure to run the Platform installer from the Identity Admin user account.
-
On the Itron Software License Agreement screen, read the agreement, select I accept the terms in the license agreement, and then click Next.
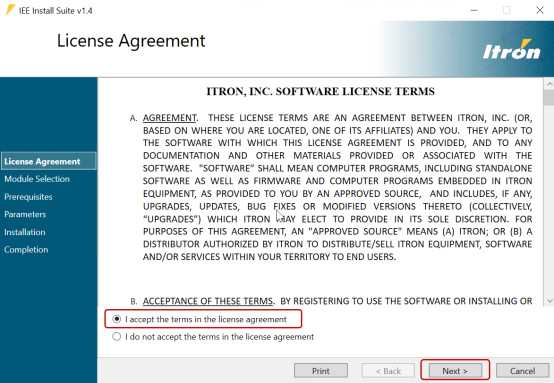
The Module Selection screen appears.
-
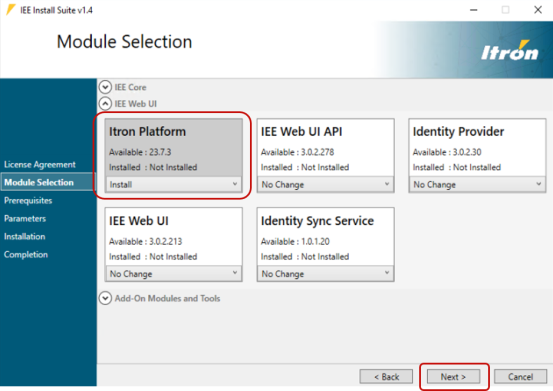
In the Itron Platform dropdown menu, select Install, and then click Next.
-
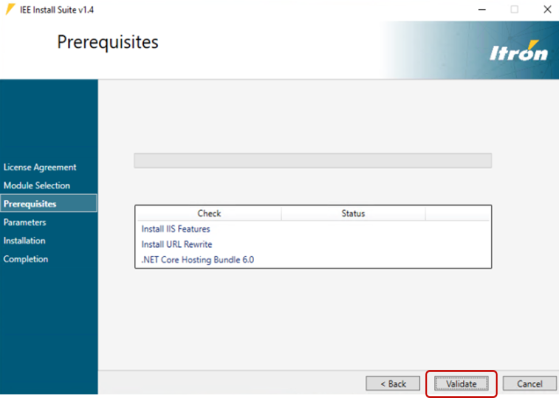
On the Prerequisites screen, the required tools and applications appear in the Check column. Click Validate.
-
The Prerequisites screen displays the required prerequisite tools and applications. If any prerequisite status fails, the installer will automatically start installing the required prerequisites.
When the Prerequisites validation process completes, click Next.
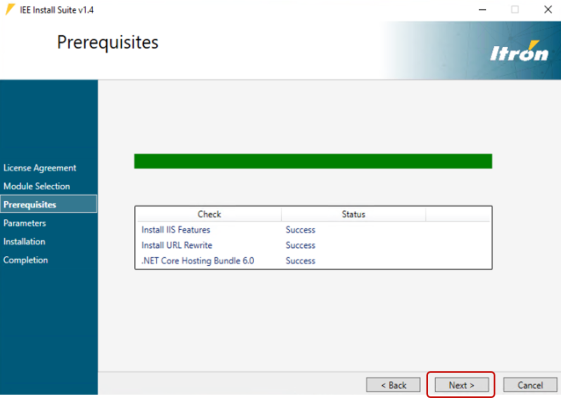
Note: If IIS features has been installed as part of the validation process, a dialog confirms the IIS installation and asks if you want to restart the machine. Click Yes.
After the restart, re-open the installer and proceed to the Parameters screen.
-
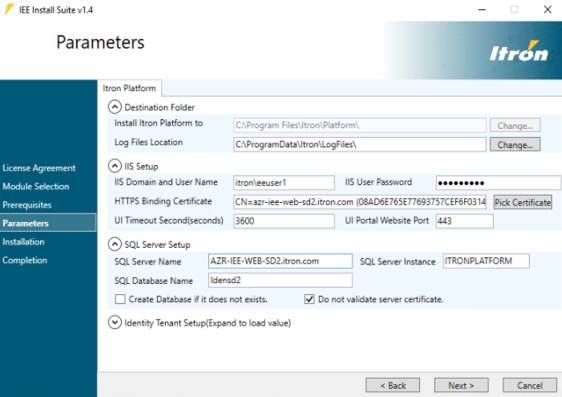
Enter the required parameters.
The Itron Platform tab contains the following fields:
-
Destination Folder:
-
Install Itron Platform to. The directory where Itron Platform will be installed. The default installation location is C:\Program Files\Itron\Platform\. Click Change and select another directory if needed.
-
-
IIS Setup:
-
IIS Domain and User Name. The IIS domain and Active Directory account for the IIS Application Pool Identity. Use the following format:
DOMAIN\username
-
IIS User Password. The IIS Application Pool Identity password associated with the username.
-
HTTPS Binding Certificate. Click Pick Certificate and select a CA/self-signed certificate with Subject Alternative Name (SAM), including host name. Select the SSL/TLS certificate previously set up. See SSL certificate.
Note: After the initial setup, the certificate bindings will remain intact for subsequent upgrades.
-
UI Timeout. The duration of inactivity, in seconds, before a user is logged out of the UI portal. The default is 3600.
-
UI Portal Website Port. The port used by the IPL API website. The default port number is 443.
-
-
SQL Server Setup:
-
SQL Server Name. The name of the SQL Server database server where the Platform database will be created.
-
SQL Server Instance. The name of the SQL Server database instance where the Platform database will be created.
-
SQL Database Name. The database name within the instance of the Platform database.
-
Create Database if it does not exist. Select this if a database with the given name does not yet exist.
-
Do not validate server certificate. Select this to skip the certificate validation process. This is only recommended for test and standalone production environments.
-
-
Identity Tenant Setup:
-
Tenant ID. This field populates automatically unless this is a first-time installation. If so, type an asterisk (*) in this field. The Tenant ID will be used to generate unique license keys to allow access to IEE's add-on modules or other Itron applications for customers with active entitlements.
-
-
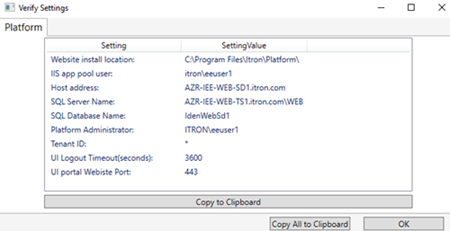
- Click Next and then verify all the settings.
- Click Copy to Clipboard to capture the settings, and then paste them into a text file for future reference.
-
Click OK.
Important! Keep a note of this information as it is needed for the installation of other components.
-
The Installation screen indicates the modules selected for installation. Click Install to begin the process.
-
The installation may take several minutes. When it completes, click Next.
-
When the installer has completed the installation, click Finish.
Note: If the installation failed, select Open Failed Installation Log to view the log file, correct the issue, click Next, and repeat the installation process. See also Installation logs.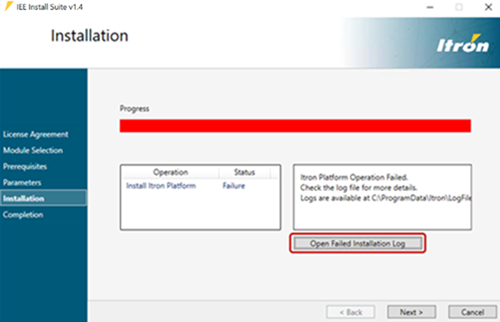
Tip: Refer to Post-installation for information about installation logs, troubleshooting, and support.