Enabling tenant access to feature flags
A Tenant Admin user can enable access to feature flags for all users under tenant.
Use the following procedure to provide this access:
-
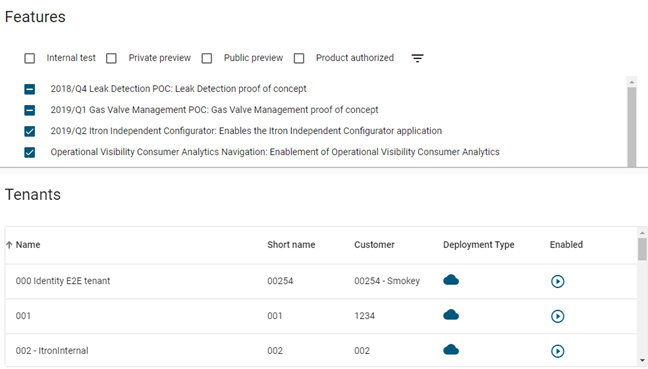
Navigate to Environment > Feature flags. The Feature flags page contains a Features panel, which lists all features available within the environment, and a Tenants panel, which lists all tenants within the environment.
Note: If the Feature flags menu item does not appear under Environment, see Enabling admin access to feature flags.
-
Under Features, review the list of feature flags and the current selections for each feature. The following screen capture provides two examples.

-
This feature flag is selected for the tenant only. Only users under the current tenant can access the feature.
-
This feature flag is selected for public view. All users under all tenants can access the feature.
-
-
Under Tenants, click the name of the tenant for which the feature flags will be enabled. On the resulting Tenant Details page, you can view a list of all features enabled for this tenant and a list of all users under this tenant.
Tip: To locate a tenant in the list, click the search icon in the page header, enter all or part of a tenant name, and press Enter. The results appear in the Tenants panel. To clear the results, click the X in the search box.

-
If needed, select any feature flags that are not already selected and click Save.
-
To view all feature flags enabled for a particular user, click a username to view that user's features. If needed, select any feature flags that are not already selected for the user and click Save.
Important! After making your changes, log out of the system and then log back on. This action is not mandatory but will ensure that your modifications properly take effect and are reflected in the user interface.