Adding an application client
-
Navigate to Administration > Tenant > Applications.
-
Locate the name of the application you wish to update. Click the application name.
Tip: To locate an application in the list, click Search (
 ), enter all or part of an application name, and press Enter or click Search (
 ) again. The results appear in the list. To clear the results, click the X in the search box.
 -
Select the Clients tab.
-
Click the Add client icon (
 ) near the bottom of the page.
 -
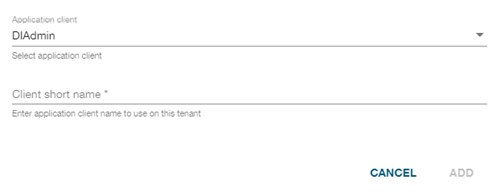
In the dialog, select an Application client from the dropdown menu:

-
Enter a Client short name and click Add.
-
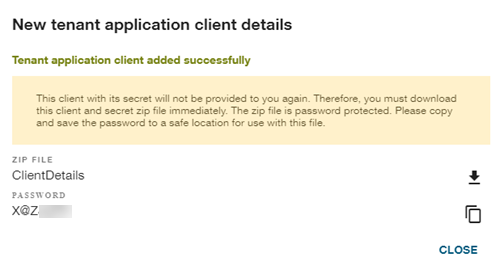
In the New tenant application client details dialog that appears, click the copy icon (
 ). The password is copied to your clipboard. Paste this information immediately to a text file and save in a secure location.
 Important! The password is essential and will not be provided again. Be sure to copy it immediately and save it. The password is required for opening the text file within the ClientDetails.zip file that you will download in the next step.

-
Click the download icon (
 ) to download the ClientDetails.zip file. This file will save to your browser's default download location. The password provided in the previous step is required for opening the text file within the ClientDetails.zip file. The text file contains the clientId and clientSecret, which are used to request an authorization token.
Important! Once you close the dialog, you will not be able to retrieve this information. Make sure that your information and client zip file are saved in a secure location.
-
Click Close.