Installing OHS on the target machine
Prior to installing OHS, make sure that you have downloaded the latest installer and have saved the client ID and secret. Refer to Downloading the installation package.
-
Extract the downloaded zip file, open the installer (executable file), and click Install. The installer detects any existing OHS versions (2.1 or higher) and attempts to perform an upgrade.
Note: If there is no existing OHS installed, a clean installation will be performed. In this case, click Browse and indicate a File Location. Enter the required credentials when prompted.
-
Accept the license terms and conditions and click Next.
-
The networking prerequisites for installations are listed in the dialog that appears. Click Run networking checks and to verify network connections.
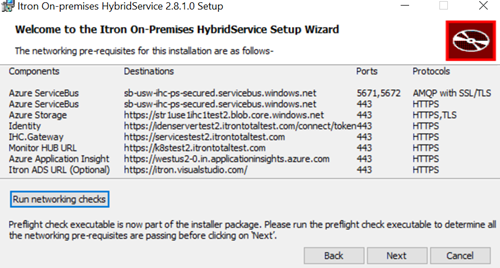
Important! Make sure that all networking checks have passed before proceeding with the installation.
The results appear as shown. Look for any FAILED results and take the necessary steps to resolve any issues.
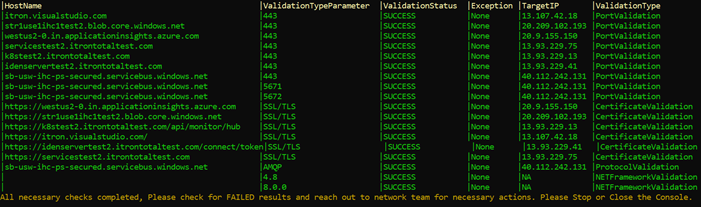
Note: You can also check logs from the log files named PreflightReport_<Timestamp> in the Preflight folder in the installation location.
Click Next.
-
Select the location where OHS is to be installed. The default location is C:\Program Files\.
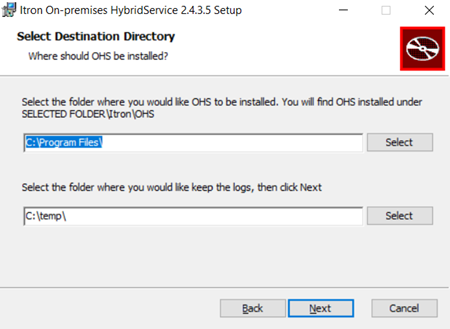
Click Next.
-
The Client Details zip location to be provided by selecting the path where it's been download and the Password copied in step 1 to be entered in Password field.
For File Location, click Browse and select the path where the ClientDetails.zip file is located. Enter the Password obtained earlier (see Creating and configuring a new OHS instance).
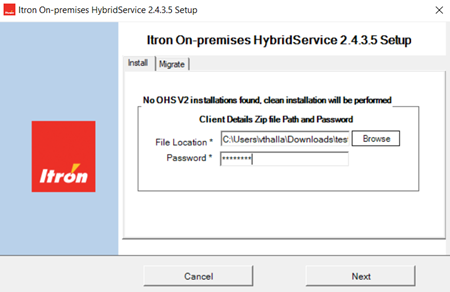
Click Next.
-
The "Installation successfully completed" dialog appears. Click Close.
-
Open the Windows Services app and start the following services:
-
OHS Management service (Itron.Platform.OHS.Management_2.x.x.x)
-
OHS service (Itron.Platform.OHS_2.x.x.x).
-