Managing Dashboard Cards
You can customize and refine your dashboard cards in the following ways:
- To re-size a card, click the Actions icon (
 ) on the card itself and select Small, Medium, or Large. The card re-sizes automatically.
 - To configure whether each card shows received or sent transactions, click the Actions icon () on the card itself and select Configure. In the dialog box that appears, select an available option (for example, Notifications received or Requests sent) and then click Update.
- To remove a card from you dashboard, click the Actions icon () on the card itself and select Remove. Confirm this action by clicking Remove in the dialog box that appears.
- To rearrange the cards on your dashboard, click Actions (
 ) in the page header and select Order. In the dialog box that appears, click and drag the order icons (
 ) to the desired locations in the card list.
 -
To add a new card to your dashboard, click Actions (
) in the page header and select Add. In the dialog box that appears, select the desired card or cards and then click Add.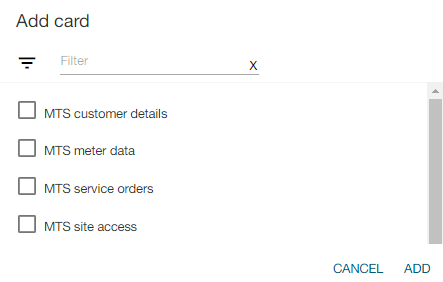
Tip: To quickly locate a card option in a long list of options, click the filter icon (
 ), enter all or part of a card name, and then press Enter. The results appear in the list. To clear the results, click the X in the filter box.