DBeaver Online Setup
To install and configure DBeaver with an active internet connection, use the following procedure:
Download the latest DBeaver Community Edition installer (64 bit): https://dbeaver.io/files/dbeaver-ce-latest-x86_64-setup.exe.
Double-click the DBeaver installer file to begin the installation.
Note: If needed, unblock the installer package by right-clicking on the .zip file and selecting Properties > Unblock > Apply > OK.
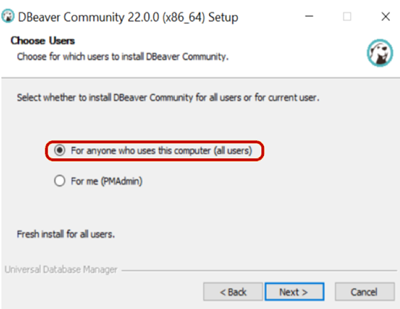
Select For anyone who uses this computer (all users) and click Next.
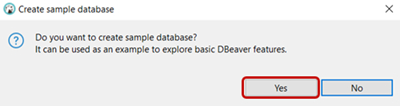
After the installation completes, open DBeaver. In the Create sample database dialog that appears, click Yes.
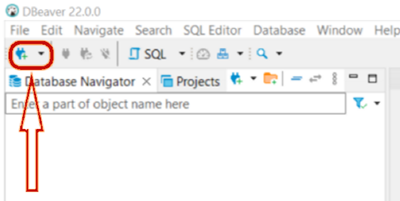
From the DBeaver toolbar, click the Connection icon.
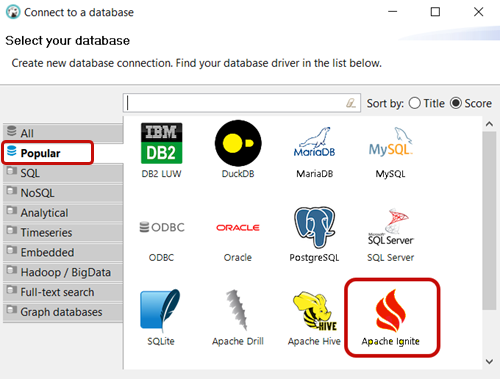
In the Select your database dialog, select Popular (or All) > Apache Ignite. Click Next.
In the Generic JDBC Connection Settings dialog, replace localhost with your IMS server host name (FQDN) in the Host field. Leave the Port field blank to use default port 10800. Click Test Connection.
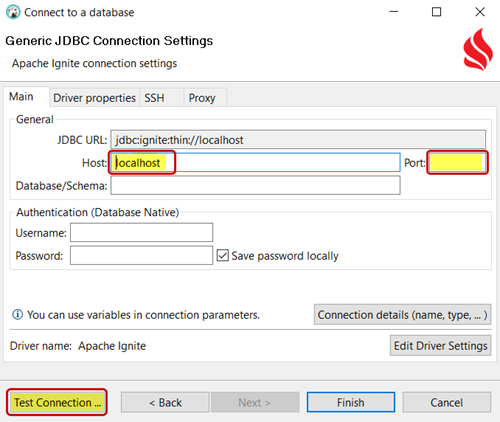
Important! The Test Connection function will not work if the IMS service not installed. If the IMS service is installed and the connection test is unsuccessful, enter 10801 in the Port field and try again. If this doesn't work, increment the port number by one until the connection test is successful. Ignite will accept and keep the designated value as its available port.
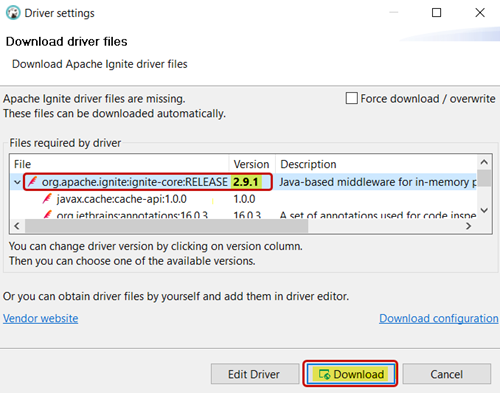
In the Download driver files dialog, click the value shown in the Version column and select 2.9.1 from the dropdown menu. With the correct version selected, click Download.
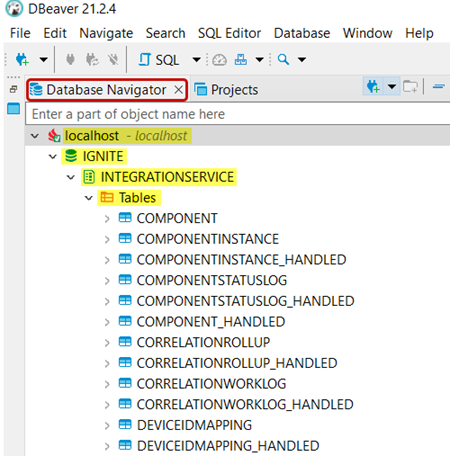
Confirm that the Ignite database tables have been successfully downloaded and integrated with IMS. On the DBeaver Database Navigator tab, select your IMS server host name (instead of localhost, as shown below) and expand IGNITE > INTEGRATIONSERVICE > Tables. The following tables should be listed.
Tip: If the connection cannot be established, check to ensure that the IMS service is running.