Installing a license file
To install a license file, you must have access to the file system on the on-premises machine. You must also have permissions to restart IIS on the on-premises machine.
Caution: After an updated license file has been installed, an older license file can still be applied and will be accepted. This will cause the system to revert to the older license. To prevent this, delete or archive any older license files.
-
Sign in to the portal using the Platform Administrator account and download the license file.
Note: If you already downloaded the license file during the tenant-creation procedure, skip this step.
Navigate to Environment > Tenants, locate the tenant, and click the tenant name. Select the Licensing tab, click Actions (
 ) in the page header, and select Generate license file. The license file is saved to your browser's download folder.
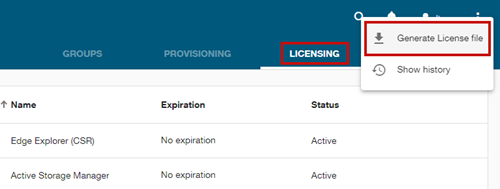
-
Locate the license file provided by Itron.
-
Place the license file into the following folder on the Identity server:
%PROGRAMDATA%/Itron/Platform/License/
Caution: Do not rename the license file. Make sure that you keep the file name in its original format (Licenses_<tenantId>.lic).
Important! If the License folder doesn't exist in the Platform folder, create a new folder and name it License.
The licensed add-on module is now enabled.
-
On the Identity server, restart IIS from an administrator command prompt:
IISRESET
-
Using a browser, navigate to the Web UI URL (https://<ServerFQDN>), sign in with the Platform Administrator account, and go to Tenant > Licenses. Verify that the license is listed on the Tenant Licenses page.
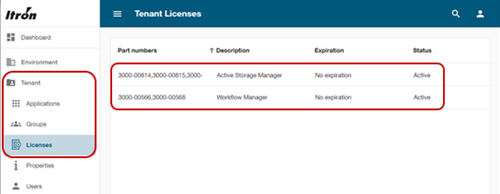
To view the licenses, the Tenant Reader permission (or higher) is required.
Note: The location of the license file can be configured in the appsettings file of the Tenant Management API: Open \Platform\Identity\TenantManagement\appsettings.OnPrem.json and edit the LicenseFilePath property.