Route hierarchy name
The route hierarchy name code table defines values for the route hierarchy name. Each ![]() route hierarchy can have up to ten levels. Each level is assigned a Route Hierarchy Name that defines that particular level in the hierarchy. For example, the Route Hierarchy Name for Level 1 might be State.
route hierarchy can have up to ten levels. Each level is assigned a Route Hierarchy Name that defines that particular level in the hierarchy. For example, the Route Hierarchy Name for Level 1 might be State.
Enter the names in hierarchical order, starting with the top level (such as State) and continuing down the tree to the bottom level (such as Branch).
Important! You cannot change the levels after you assign values to them.
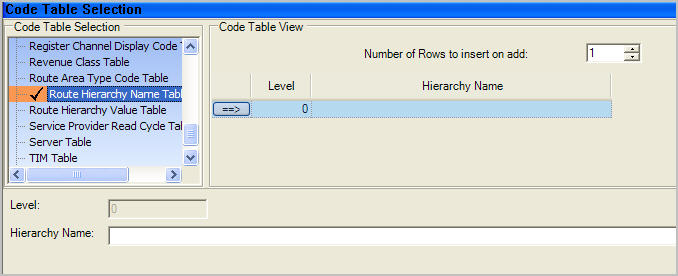
Configuring the Route Hierarchy Name Code Table
-
Go to System Administration > System Admin > Code Table Setup.
-
From the Code Table Selection list, select Route Hierarchy Name Table.
-
Use the Number of rows to insert on add dropdown menu to select the number of blank rows to add to the code table.
-
From the Code Table Setup menu, click Add. The new rows display in the table.
-
Click
 to select a row that you added and configure the following parameters.
-
Level. Enter a number between one and ten.
-
Hierarchy Name. Enter the name to assign this level in the hierarchy.
Note: The top level is always zero (0). You cannot change this number.
-
-
Click Enter to save the values to the code table.
-
Repeat for each level.
-
Click Save.
Note: After updating any code table, you must restart the IIS service for the changes to take effect.