Linking a user using Windows Active Directory
-
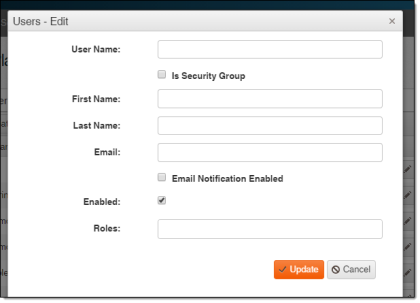
On the User Security page, click Create.
-
Type a username in User Name. This must be formatted as domain\username.
-
(Optional) Select the Is Security Group checkbox if the user is a security group. This option allows you to use a Microsoft Windows Active Directory (AD) group as the user, and all members of the group will be able to login with their AD credentials.
-
Type the user's first name in First Name.
-
Type the user's last name in Last Name.
-
Type the user's email address in Email.
-
(Optional) Select the Email Notification Enabled checkbox to enable email notifications for the user.
-
(Optional) Clear the Enabled checkbox if you want the user to be disabled. The Enabled checkbox is selected by default.
-
Select the appropriate roles for the user from the Roles menu. More than one role can be selected.
Tip: When a user has multiple roles with access to an app, all roles must have the denied function to block access to the function.
-
Click Update.