Creating a user using Itron-hosted Azure Active Directory
This functionality is only available to users with Tenant Admin permissions in the Itron Cloud Services Platform.
-
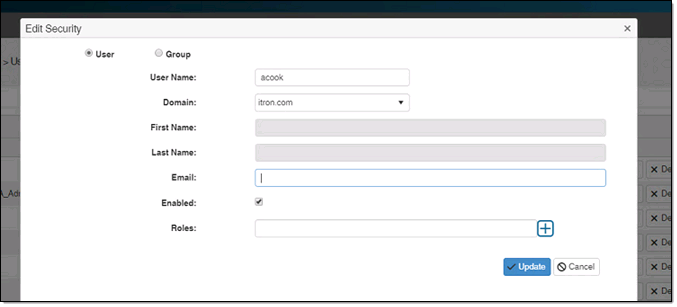
On the User Security page, click Create.
-
Verify that User is selected.
-
Type a username in User Name. Do not include the domain name. If the user already has an Itron Identity account, this must be typed as an exact match to avoid creating a duplicate.
Important! This must be typed as an exact match to avoid creating a duplicate or E_No_User errors when signing in. A common mistake is entering a user's full email address (for example, joe.smith@itron.com) when the expected value is the User Principal Name (UPN) format (for example, jsmith). For more information about sign-in errors, see Common Validation Errors in the Tenant Management Online Help.
-
Select itrontotal.com from the Domain dropdown menu.
-
Type the user's first name in First Name.
-
Type the user's last name in Last Name.
-
Type the user's email address in Email. This will be used for password recovery and other administrative functions.
-
(Optional) Clear the Enabled checkbox if you want the user to be disabled. The Enabled checkbox is selected by default.
-
Select the appropriate roles for the user from the Roles menu. More than one role can be selected.
Tip: When a user has multiple roles with access to an app, all roles must have the denied function to block access to the function.
-
Click Update.
Itron Analytics checks if the user already exists in Itron Identity. If the user exists, the user is added to Itron Analytics. If the user does not exist, the user is added to the hosted domain, the tenant, and Itron Analytics.
An Add user confirmation window appears displaying the username and temporary password.
-
Click the Copy icon to copy the username and temporary password.
-
Email the username and temporary password to the user. They will be prompted to change their password during initial login.