Set up the AWS Cloud9 environment
-
Navigate to the AWS access portal and sign into your account.
-
Click on your virtual SDK developer account and select the AWSAdministratorAccess link.
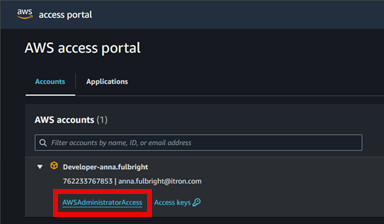
AWS signs you into your Console Home.
-
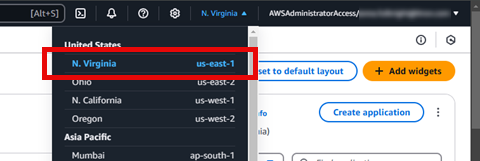
Use the region dropdown menu to select the N. Virginia region. If you require another region to be set up, contact Itron at DI-SDK-Access@Itron.com.
-
In the search bar, type Cloud9.
-
In the results, under Services, click Cloud9.
The AWS Cloud9 Developer Tools page opens.
-
Under New AWS Cloud9 environment, click Create environment.
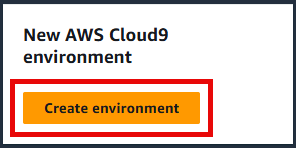
The Create environment page opens.
-
In the Name field, type a name for the environment, for example, Itron-SDK-Cloud9.
-
In the Description field, you can choose to type a description or leave the field empty.
-
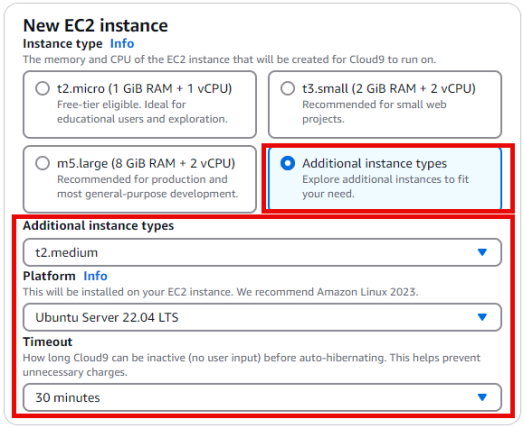
Under Environment type, select New EC2 instance.
-
Under New EC2 instance, select Additional instance types.
Tip: If the Additional instance types selection is unavailable, it is likely because the region you selected in step 4 is not enabled. Try selecting a different region to make Additional instance types available.
-
From the Additional instance types dropdown menu, select t2.medium.
-
From the Platform dropdown menu, select Ubuntu Server 22.04 LTS.
-
From the Timeout dropdown menu, select how long you want Cloud9 to remain inactive before it starts auto-hibernating. Itron recommends setting auto-hibernate to start after 15 or 30 minutes.
-
Click Create.
-
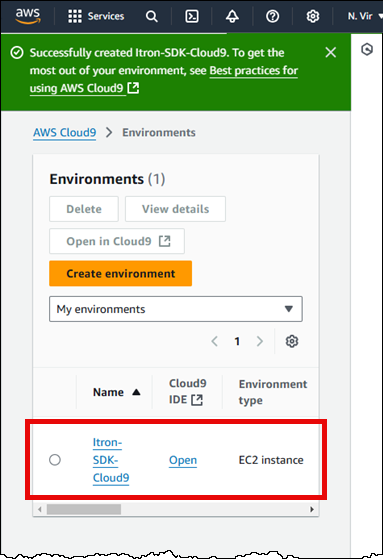
Wait while AWS creates your new environment.
When the environment is created, a success banner displays at the top of your window.
-
Click Open to verify in your new environment loaded successfully.
-
Go to the procedure Resize the Amazon Elastic Block Store (EBS) volume of your Cloud9 environment.